Chicago’s 2014 Michelin Guide

M
Every year I wait with bated breath to see who the Michelin Restaurants around the world are going to be. To top it off, after years of living in small towns and cities (minus a short 2-year stint in Boston), I FINALLY live in a city that actually has those kind of restaurants!

Well, today is the day that the 2014 list has arrived! This year, 25 amazing Chicago restaurants made the list (including a restaurant from one of my favorite chefs, Graham Elliot) and I couldn’t be more excited to try them all.

I guess I better win the lottery so I can afford all these expensive meals…

Here is the list straight from the Chicago Tribune:

Three Stars
Alinea

Two Stars
Grace *
Graham Elliot
L2O
Sixteen **

One Star
Acadia
Blackbird
Boka
EL Ideas *
Elizabeth *
Everest
Goosefoot
The Lobby *
Longman & Eagle
Mexique
Moto
Naha
North Pond *
Schwa
Senza *
Sepia
Spiaggia
Takashi
Topolobampo
Tru

* New to 2014 Michelin guide
** Elevated from last year’s one-star rating 

Which restaurant is on your list to try?

Love always,
Erica

The Easiest Way to Boil and Peel Eggs

hard boiled eggs

Photo Credit: mybizzykitchen.com

I absolutely love deviled eggs! That being said, up until a year ago, I use to freak out every time I had to make them, because the process of boiling and peeling the eggs was just so tedious. I always found myself losing an egg or two because I destroyed it, or even worse, I’d spend 10 minutes peeling tiny bits of shell off a single egg.

Not anymore! After years of trial and error (and a 2-month stint on the Atkins diet, where all I ate was hard boiled eggs), I’ve finally found the easiest way to do it!

Follow these 5 simple steps and kiss that egg peeling anxiety goodbye:

What You’ll Need
Eggs (it doesn’t matter how many)
A large pot with a lid
Water
A pinch of salt

 What You’ll Do
1) Place the eggs in the bottom of a large pot. Fill with cold water and just enough cover the tops of the eggs. Add a pinch of salt.

2) Bring eggs to a boil slowly (medium heat is good). Once eggs start to boil, let them continue to boiling for 1 minute.

Bring the eggs to a boil

Bring the eggs to a boil

3) After 1 minute, remove from the heat and cover the pot. Set the timer for 12 minutes.

boiling eggs

Eggs cooking in boiled water

4)  Once the timer goes off, drain the eggs and run them under cold water (or place them in a bowl with ice & water). This step is critical and will help the shells come off much easier. If the water gets too warm, add more ice or more cold water.

boiled eggs cooling in ice bath

Eggs cooling in ice bath

5)   After about 5 minutes of cooling, it’s time to peel the eggs! The easiest way is to gently crack the egg on the counter top and then push your finger tips into the egg to create cracks all over the entire shell (do this under running water). Once you do that, keep holding the egg under running water and start to peeling away!

If the last step confused you, check out my quick video on my Facebook Page to see how to peel an egg (don’t mind the lack of makeup, I wasn’t prepared to do this, but I figured it would help).

Oh, and while you’re on the Facebook page, if you haven’t already done so, click that little “like” button on the homepage :).

Love always,
Erica

Recipe: Quinoa Stuffed Tomatoes w/ Goat Cheese

Quinoa Stuffed Tomatoes

Quinoa Stuffed Tomatoes
Photo Credit: theshiska.com

I am always looking for new and fun things to do with quinoa. If you don’t already know, quinoa is one of the world’s super foods. Although most people think it’s a whole grain, it’s actually a seed and provides all 9 essential amino acids (making it a complete protein). There are lots of things you can do with this wonder seed, but one of my favorites is stuffing it inside of a tomato!

This recipe is great, even for those who have never tried quinoa or think they don’t like it.

What You’ll Need
3 large tomatoes
1/4 cup quinoa
1/2 cup liquid (either water or tomato juice from actual tomatoes)
1/2 tablespoon olive oil
1 clove of garlic, crushed
1 tablespoon grated parmesan
3 tablespoons goat cheese
Salt and Pepper to Taste

What You’ll Do
1) Cut the tops of the tomatoes off and remove them. Take a small knife and cut around the inside edges and remove the inner core/seeds from the tomato with a spoon. Make sure to leave the walls of the tomato intact. Set the tomato core/seeds aside in a separate bowl (you will need these).

Hollowed out Tomato

Hollowed out Tomato
Photo Credit: Mary Cokenour

2) Take the seeds/core of the tomato that you reserved and put it through a wire mesh strainer. This will get you the 1 cup of liquid you need to cook the quinoa. If you don’t get a full cup, add water to top it off.

3) Pour the tomato liquid/water mixture into a sauce pan and add crushed garlic.

4) In the same wire mesh strainer, rinse quinoa under cold water for a couple of minutes and add to pot.

5) Bring the quinoa to a boil and reduce the heat to medium/low. Cover the pan and let the quinoa cook for about 20 minutes (you will know it is done when all of the liquid is gone and the quinoa is soft).

6) While the quinoa is cooking, pre-heat the oven to 425 degrees. Then, take your hollowed tomatoes and brush them with a little bit of olive oil.

7) When the quinoa is finished, full with a fork (like you would with rice) and then gently fold in the parmesan cheese. At this point I would taste it to see if it needs salt and pepper.

8) Place the cooked quinoa in each of the tomatoes and top with 1 tablespoon of goat cheese. Bake in the oven until golden brown (about 20-25 minutes).

I hope you enjoy this recipe! It’s one of my favorites and I will be excited to hear about what you think!

Love always,
Erica

Recipe: Utica Italian Greens

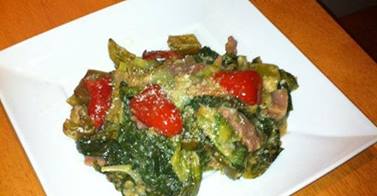
Utica Greens

Erica’s Utica Italian Greens

My guess is that most of you probably don’t know what “Utica Greens” are. The fact is, up until I went to college in Utica, I didn’t know what they were either! This regional appetizer is a specialty that you’ll only find in Central NY, so when I moved away, I needed to find a recipe to fulfill my craving!

The typical Utica Greens are a sautéed mix of escarole,  cherry peppers, bread crumbs, prosciutto, parmesan cheese and then broiled to form a golden crust on top. This signature dish is usually served as an appetizer, but sometimes can be found underneath an Italian chicken dish or scrambled in with eggs!

After hundreds of attempts, I believe that I’ve finally perfected the recipe and am I excited to share it with you!

What You’ll Need
1 head of escarole
2 cups chicken stock
1 cup water
2 cloves of garlic, minced
3 thick slices of prosciutto
6 sweet cherry peppers, seeded and halved (sold in a jar)
3 hot cherry peppers, seeded and halved (also sold in a jar)
1/2 cup breadcrumbs
1/2 cup fresh grated parmigiano-reggiano
EVOO

What You’ll Do

1) Pre-heat the oven to 475 degrees. Clean the escarole and remove the stems. You can do this a lot of different ways, but I prefer to take each leaf off, run it under water and scrub off the dirt. You can also put all the leaves in a bowl of water and let they dirt fall to the bottom. Break the escarole into smaller pieces (usually in half works).

3) Heat about 1 tablespoon of EVOO in a deep skillet over medium low. Drop the minced garlic and prosciutto in. Once the prosciutto gets crispy, take out and set aside. Add the both the hot and sweet cherry peppers and continue to sauté. Once the start to soften, add the breadcrumbs and start toasting them in the pan.

3) At the same time, bring the chicken stock and water to a boil. Drop the escarole in the boiling stock/water and boil for 3 minutes. This step is imperative since it will help remove any of the bitterness in the escarole.

4) Drain the escarole and transfer it right to the sauté pan. Sauté around for 3 minutes and then add a splash of the juice from the hot cherry pepper jar. This is the secret to making the most unforgettable greens.

5) Let the cherry pepper juice cook out a little bit and then stir in 2/3rd of the parmigiano-reggiano. Add the prosciutto back in and combine everything together.

6) Put the greens in an oven safe baking dish and top with remained cheese. Bake until golden brown on top (about 8-10 minutes). Serve and enjoy!

Final Greens

Utica Greens in Baking Dish

Whether you live in Utica (and consider yourself a “greens connoisseur” ) or have never heard of this dish in your entire life, I encourage you to follow this recipe and enjoy a little Central NY legacy :).

Love always,
Erica

Review: Sidewalk Food Tour of Chicago, River North

If it’s one thing my boyfriend knows how to do, it’s plan a good date! I wish I could take credit for finding this culinary tour around Chicago’s River North neighborhood, but this time, it was all him!

This tour started around noon and it was essentially a  3-hour walk around River North, where I  learned about some of Chicago’s rich architectural history while stopping at 6 culinary gems along the way.

Let’s talk about where we went and what we ate:

Buttermilk Old Fashion from Doughnut Vault

Buttermilk Old Fashion from Doughnut Vault

1) The Doughnut Vault: This River North staple has been on my bucket list of places to try, but I simply haven’t gotten around to it (mostly due to their limited hours and long lines).  I was excited for this to be the first stop on the tour since I had heard so many great things about it (and could finally try it without waiting in the line).

As a part of the tour we got to try a “Buttermilk Old Fashioned” (although we didn’t get a whole one) and it was pretty good! I have to be honest though, I’ve had better doughnuts and was surprised to hear that this one was awarded “the best” by Food and Wine Magazine. I say if you don’t have to wait in a 2-hour line to try one of these, go for it. If there is a line, save the $2 and the excessive calories.

2) Lou Malnati’s: Since moving to Chicago, I’ve had deep dish from almost every popular place in the city. While I do like Lou’s, I was initially bummed that this was a part of the tour since I’ve had it so many times and I think the pizza lacks salt (therefore when I eat it at home, I can just add it myself).

Never-the-less, I’ll never turn down a slice of deep dish pizza and I actually learned something during this part of the tour! Apparently, Lou’s has this special “butter crust” that you have to ask for, otherwise you get their regular crust made with oil.  We got to try the butter crust and it was absolutely delicious. Learning that fact was enough to give this stop a gold star!

Lou Malnati's Deep Dish Pizza

Lou Malnati’s Deep Dish Pizza

3) Xoco (pronounced “show-co”):  I am HUGE fan of anything Rick Bayless (the owner of Frontera Grill, Topolobampo and of course, Xoco), so when I heard this gem was on the list I got super excited. I had gone here once before for lunch and found it to be absolutely delicious.  On the tour, we got to try the restaurants “Aztec Hot Chocolate” and the churros.

The hot chocolate was super rich and creamy, but totally overshadowed by how incredible the churros were. When I tell you that this may be one of the most delicious things I have ever eaten in my entire life, I’m not lying. PLEASE, do yourself (and your tastebuds) a huge favor by getting yourself some of these Xoco churros. In fact, I couldn’t even get a photo of them because they were eaten too quickly.

4) Al’s Roast Beef: This is another Chicago staple that has been on my culinary bucket list since I moved here. They are famous for their italian beef. If you don’t know what that is (don’t worry I didn’t either until I moved to the Midwest), it’s basically beef cooked in tons of juices until its about medium rare. It’s then shaved off the bone and put back in more juices making it super tender!

As a part of the tour, we were able to try a 1/2 of an italian beef and it was pretty good! My favorite part was actually the pickled vegetables they put in the sandwich. They were briny and spicy and brought a whole new level of complexity to the sandwich. I don’t think I would ever go back for another one, but I can understand why it’s such a popular sandwich.

Me wearing my bib at Carson's

Me wearing my bib at Carson’s

5) Carsons: This restaurant was the star of the day! This is a very unassuming, yet super traditional  BBQ restaurant in Chicago. I have to be honest, I must have driven by this place 100 times since moving here and I never even noticed it.

As a part of the tour, we got to try the pulled pork sandwich and it was pretty incredible. The BBQ sauce was a Carolina vinegar based sauce (which I love) and was perfectly paired with a pickle (sounds strange but you just gotta try it).

The best part about Carson’s? The owner actually puts his personal cell-phone number on the menu in case you have any questions, comments or concerns. I think I may use it and set-up a time to go in so that I can write a full review on this place.

6) More: Our final stop of the day was at More (a cupcake shop). Since I had already been here before, it was a little anti-climactic, but the cupcakes at this place are pretty good. On the tour we got to sample their classic cupcake which is basically an up-scale version of a Hostess. It’s good, but after a day full of doughnuts and churros, I was a little stuffed!

However, this place DID made Oprah’s list of favorite things, so you know it has to be good!

So that’s it! If you find yourself salivating about all the amazing food I tried today, you can easily go on this tour as well! Just head over to their website and book it (they also do one in Wicker Park).

Love always,
Erica

I want YOUR Feedback!

I want you for feedback

Photo Credit: http://www.poach.com

My blog is a little over a week old and I want to know what you think!

Ultimately, I want to write content that you enjoy. Please help me by filling out the poll below. This will help me to better understand where to focus the majority of my efforts!

Have another idea? Let me know in the “other” section. I truly value my readers thoughts, ideas and feedback. 🙂

The 5 Best “Meat” Substitutes on the Market

Meat Alternative

Photo Credit: http://www.slate.com

Being a foodie, you’d think I would have grown up with a a foodie family or put myself in a relationship with someone who was equally as passionate about food.

Wrong.

My Dad is a vegan and my boyfriend is a vegetarian. I figured since life gave me lemons (and I mean that in the nicest way possible), I would have to try and make lemon “chicken” out of it.

Whether you’re a vegetarian yourself, or know someone who is, navigating the grocery store to find the best meat alternatives can be challenging! Well, since I’ve tried them all, I am taking the guess work out of it for you.

Here is my list of the best meat alternative products on the market:

Morning Star Original Sausage Patties

Morning Star Original Sausage Patties
Photo Credit: Morningstarfarms.com

1)  Morning Star Farms: Original Sausage Patties: I literally can’t start my day without one of these delicious “sausage” patties.  I would even go as far as saying that these may taste better than some real frozen sausage patties on the market.

When I discovered these, it made breakfast time so much easier for me and my boyfriend! Now I don’t have to make 2 different types of breakfasts for us. We both now enjoy a “sausage”, egg and cheese breakfast sandwich or a delicious frittata with “sausage”, tomato and spinach.

They  come in two other delicious varieties: maple and hot and spicy. I’ve tried both and will proudly say you can’t go wrong with any of them!

Phoenix Bean Tofu

Phoenix Bean Brand Tofu

2) Phoenix Bean Brand Tofu: Up until about four months ago, I absolutely refused to eat tofu. The mere thought of it actually made me quiver a little bit. This all changed when I went over to the Green City Market in Lincoln Park and saw this little tofu stand with samples. My boyfriend, Dan, bee-lined to this tiny tofu shop and I followed hesitantly.

After trying a couple of samples, I was officially hooked on this Chicago based tofu company. This brand comes in a million varieties and there are so many different ways to serve them. Check out their website to learn some cool recipes.

Sad news for all my friends not in the Midwest…they are currently only out here for now, but hopefully coming to a city near you soon!

Gardein Selection

Photo Credit: Gardein.com

3) Gardien: This product line is fantastic for vegetarians and vegans alike! They have an overwhelming variety of meat substitutes to choose from and some are better than others.

My favorites include:

a) The crispy tenders: Serve these in place of chicken tenders. Use them in a buffalo “chicken” wrap or with your favorite wing sauce

b) Mandarin orange crispy chick’n: This is by far my favorite flavor of the chick’n’s. It’s sweet, a little spicy and tangy. Make sure you cook these in a skillet or they can become a little soggy

c) Beefless sliders: These are perfect for whenever you’re having a BBQ and have a meatless friends coming. I promise, you can hardly taste the difference.

Check out their product page for more!

4) Eggplant: Typically whenever I make any sort of italian dish, I know I can substitute eggplant and everyone will be happy. Preparing eggplant properly can be tricky, so take a look at my Crispy Eggplant Recipe to see how to prep it before you cook it.

If you don’t follow my steps carefully, it could turn out bitter!

Boca Burger

Photo Credit: bocaburger.com

5) Boca Brand Ground Crumbles: If it’s one dish I love most in life, it’s tacos! Being in a relationship with a vegetarian forced me to find some alternative for the ground beef. After trying tons of different brands, I found Boca. 

Do me a favor, next time you want to make tacos, but have a vegetarian to cook for, substitute the ground beef for these ground “beef” crumbles and let me know if you can taste the difference (because I surely can’t)!

They also work well in pasta sauce, lasagna or even in a taco salad. The possibilities are truly endless with this delicious and nutritious product.

Well, thats my short list of best meat substitutes/alternatives on the market! So the next time you find yourself having to cook for a vegan or vegetarian, don’t worry! There are plenty of great products on the market to help turn your next meat-less dinner into a successful meal.

Love always,
Erica

How to Make Fresh Pasta: Butternut Squash Ravioli

Butternut squash ravioli

Erica’s Goat Cheese and Butternut Squash Ravioli

Last year, one of the most mystifying dishes to me was anything involving fresh pasta. I just couldn’t get the courage up to try making it and sort of skirted the subject whenever anyone asked me if I knew how. This all changed when my boyfriends Mom, Wendy, told me I had to learn to do it and that it was simple (I wasn’t about to argue with my new boyfriends Mother).

So on one rainy Sunday afternoon, I headed into her kitchen and she taught me how to make pasta. Not only is it easy, it’s actually really relaxing and involves only 4 ingredients (and I bet you have all of them in your house right now)! Once I learned how to make it, the possibilities were endless. I started experimenting with different recipes and found that my favorite was my Goat Cheese & Butternut Squash Ravioli w/ Sage and Candied Squash.

So now, I am here to share! First I will show you how to make the pasta itself and then for those culinary dare devils, I’ll go on and tell you how to make my signature ravioli’s!

Basic Pasta Recipe

fresh homemade pasta

My first time making fresh pasta

What You’ll Need

3 eggs
2 cups of flour
1/2 tsp of salt
1/2 tsp EVOO

What You’ll Do

1) Mound the flour onto a clean surface and make a well (a hole) in the center of it.

2) Crack your eggs into the well, drizzle with 1/2 tsp of EVOO  and beat with a fork (be careful not to break the well)

3) Once the eggs are lightly beaten, start to SLOWLY incorporate the flour from the walls of the well.

This process should take about 5 minutes or more. If it’s any shorter than that, you are putting too much flour in at one time.

4) Once the flour is fully incorporated and you have a cohesive dough ball,  it is time to knead the dough (the most relaxing part).

Knead the dough until it is smooth and elastic. You may need to add more flour if the dough is sticky or extremely pliable.

The kneading process takes about 8-10 minutes.

5) Let the dough rest (about a half hour).

You can store it in the fridge for up to 24-hours, but if you do, make sure it comes to room temperature before you roll it out and make your pasta!

Goat Cheese & Butternut Squash Ravioli Recipe

Rolling fresh pasta dough

Rolling out fresh pasta with Kitchen Aid attachment

What You’ll Need

Dough
Fresh Pasta Recipe (see above)
A pasta roller (don’t have one? no worries! I’ll give you an alternative solution)

Filling
1 butternut squash, peeled and cubed
3 ounces of goat cheese
1 teaspoon cinnamon
1 garlic clove, minced
1/4 cup half and half
Salt/Pepper to taste

Sauce
4 tablespoons of butter
5 fresh sage leaves

Topping
2 tablespoons diced butter nut squash
1 tablespoon sugar

What You’ll Do

1) Pre-heat your oven to 425 degrees. Place your butternut squash cubes on a baking sheet, drizzle with olive oil, salt and pepper and bake until tender (about 25 minutes). Reserve a couple of cubes for the candied topping!

2) Take the reserved butternut squash, cut them into even tinier cubes and place into a skillet over medium heat with the sugar. Str sugar and squash with a wooden spoon until the sugar caramelizes and candies the squash.

Diced butternut squash

Finely diced butternut squash ready to be candied!

3) While the squash is baking, use your pasta roller to roll your pasta dough out into long thin sheets (about 1/8 of an inch thick).

Don’t have a pasta roller?  No problem! Put a dusting of flour on your countertop and cut the ball of dough in half. Cover one half with a moist towel and roll out the other half of the dough with a rolling pin.  If it gets sticky, you can always add flour.

Keep rolling until your sheet of pasta until it is about 1/8 of an inch thick. The dough may be difficult and bounce back after you roll it. If so,  just keep rolling it and stretch it gently with your hands until the dough is about 8 inches wide and 16 inches long. Repeat with the remaining dough.

4) Once the dough is rolled out, it is time to make your filling and fill your pasta! To make the filling, blend together the butternut squash, goat cheese, cinnamon, minced garlic and half and half until smooth. If mixture is too thick, add more half and half. Taste and season with salt and pepper if needed.

5) Fill your ravioli!

I think the easiest way is to place 1 tablespoon dollops of the filling along the entire sheet about 1 inch apart. Top with second sheet of dough and use a circular cookie cutter to cut out your raviolis (see photo below). I place a tiny dab of water on the edges before sealing to help them stay closed. Once cut, keep under damp cloth with flour to keep them from sticking.

Butternut squash Ravioli

6) Make the sauce! Melt 2 tablespoons of butter and sage leaves over low/medium heat until it turns brown

7) Once your ravioli are all cut out and the sauce is almost browned, place the ravioli into boiling water for about 3 minutes each (they will float to the top when they are done). Use a slotted spoon to drop them into the brown butter and sage sauce.

6) Top with candied butternut squash and serve!

Whether you prefer butternut squash ravioli or a classic spaghetti and meat sauce, my simple pasta recipe can help you rid yourself of the processed box pasta and open up the door to try all sorts of italian creations!

Until next time…

Love always,
Erica

Restaurant Review: Sunda

Sunda Logo

Photo Credit: http://www.sunda.com

Location: 110 W Illinois St  Chicago, IL 60654

Yesterday, one on my friends , Asha, who I hadn’t seen in 5 years told me that she was stopping through Chicago and wanted to grab dinner. Since she had never been to Chicago, she gave me 3 guidelines on choosing a restaurant:

1) It had to be one of Chicago’s best
2) It should be asian food (since that’s her favorite cuisine)
3) They had to have a great lounge area so we could meet one of our other friends afterwards for a drink

Enter, Sunda.

I had heard a lot about this place and had been dying to try it! This seemed like it was the perfect opportunity to check it out and I am so glad that I did.

Food Review

First of all, I want to start by saying that this may be one of the largest menus I’ve ever seen. To be honest, usually extremely large menus overwhelm me and make we worry that the food isn’t top notch (because they are spreading themselves to thin). Within five minutes of sitting down, the waitress came over, acknowledged that the menu was large and walked us through section by section. I instantly felt at ease.

The Appetizers:

Sunda Steamed Buns

Sunda Steamed Buns

1) Sunda Steamed Buns ($11): I am literally still dreaming about these. This dish is kind of like the asian version of a pulled pork sandwich. The bun is a traditional steamed bao bun and filled with crispy (yet so tender and moist) pork belly. It’s covered in a succulent hoisen sauce and topped off with a little pickled veggie slaw. They come in a duck version as well that I guess I will have to try next time! Do your self a HUGE favor and order these buns.

2) Grilled Spare Ribs ($15): You won’t find these fall off the bone spareribs ribs at your traditional Chinese restaurant. These ribs are super thin cut (still attached to the bone), but barely holding on because of how tender they are. If you love meat, I don’t think you can go to Sunda without trying these.

3) Ohhkoy Fritters ($10): One of my favorite appetizers in the world is the Bird’s Nest from Trader Joes (here is the only review I could find on them). Well this appetizer far exceeds the boxed version (which I didn’t think was even possible). This tempura fritters are made up of super thin kale, carrots, zucchini, sprouts, ginger and coriander.  Just check out the picture below to see this masterfully designed dish.

Ohhkoy Fritters

The Ohhkoy Fritters

The Sushi:

1)  Spicy “Tale of Two Tunas” ($16): This dish is truly a tuna lovers paradise. With yellowfin, pickled jalepeno, spicy mayo and fried shallots, how can it possibly be bad?

2) Lobster and Wagu ($21): I know what you’re probably thinking, $21 for a sushi roll?!? Listen, you have the most decadent lobster paired with one of the worlds best steaks. If you love surf and turf, this roll is worth every penny. Oh an did I mention it has a truffle-foie aioli?

3) Firecracker ($14): This was probably the most unique roll I had. Basically, it was a spicy tuna roll jazzed up. It was layered with cream cheese, jalepeno and water chestnuts. It was tempura fried and then topped with chili threads, unagi sauce, spicy mayo and MORE tempura crumbs. Yum!

Sunda Sushi

Dessert

1) Mochi Ice Cream ($10): I have to be honest, I don’t typically order dessert at asian restaurants. This all changed when I saw that Sunda had mochi ice cream on the menu. If you don’t know what this is, its essentially like a fluffy (but kind of sticky) dough, dusted with an unflavored white powder and wrapped around ice cream. If you like ice cream, this takes it to an entirely different level.

Normally, if places have this on the menu, you choose one flavor. At Sunda, they give you 5 FLAVORS: vanilla, red bean (just try it, it’s delicious), green tea, strawberry and mango. They are served with three delicious sauces (carmel, chocolate and strawberry). This was one of the most innovative presentation of a traditional asian dessert that I had ever seen.

Sunda's Mochi Ice Cream

Sunda’s Mochi Ice Cream

Overall

Overall I have to give my experience at Sunda an A+. Not only was the service, ambience and food exquisite, but I literally walked away with not a single complaint. With a menu that large, I figured they had to screw up somewhere! I’ll have to head back soon and see if I can catch them with a bad dish next time (although I doubt I will) 🙂

Love always,
Erica

Restaurant Review: Mastro’s Steakhouse

Price: $$$$ ($50 and up per person) Last weekend, my boyfriends parents came to town to visit us from Boston. For most people, this situation would probably drum up tons of anxiety and ensue a potentially uncomfortable situation. However, I am one of the lucky ones who have the most incredible “dating in-laws” (yes I made that up) that you can ever imagine. These people are truly my second family and I couldn’t have been more excited to have them in town! 🙂

Dan’s Mom is a huge foodie, and asked me to plan the weekends dinners. Instantly, I knew I had to take them to Mastro’s. I had heard really great things about the place, but hadn’t gotten around to trying it yet. That being said, Saturday night we headed over to there and now I’m going to tell you what I thought!

Food Review: 

Here is what we ordered and some feedback on each of the dishes:

www.foodspotting.com

Ahi Tuna Tartare
Photo: http://www.foodspotting.com

1) Ahi Tuna Tartare: This dish was literally incredible. Not only was it some of the freshest tuna I’ve tasted, but it was beautifully layered with avocado and crushed wontons (for texture). It was topped with a delicious sauce so complex in flavor, it is difficult to describe. It will be the best $17 you can spend on tuna, I promise.

2) Caesar Salad: I’m sort of a caesar salad snob and I have to say, this one really didn’t meet my expectations. I don’t love caesar dressings that have a heavy “anchovy” flavor , and this one definitely did. If that’s your thing, then by all means order it, but I can’t endorse this one. At $12…you can skip it!

3) French Onion Soup: Wow. This dish deserves a standing ovation. It’s crazy how a soup as simple as french onion could send my taste buds to another galaxy. The soup was rich and full of a deep beef flavor (they are a steak house, so it makes sense) and topped with delicious bread and so much cheese, it was a meal in it of itself!

Insider tip: If you are on a budget, but want to check out Mastros, head over to the bar area one night  and just order this soup. Not only will it be one of the best soups of your life, it will totally fill you up and only cost you about $11 :).

4) Hamachi with Crispy Onions: Now normally I’m not the biggest hamachi fan, but if you put crispy onions on anything, I’m totally going to try it. This dish was pretty simple and delicious. The fish was very fresh and the crispy onions added great texture. A little expensive (about $22), so I may not order it again.

5) Filet Mignon: So THIS is why you come to Mastro’s! This steak was probably one of the best I’ve had in my entire life. Dan’s Dad and I both got this and couldn’t stop talking about how incredible it was. The steak comes out on a plate so hot that the steak is still sizzling and cooking (picture fajitas coming out at a Mexican restaurant).

Mastro's Warm Butter Cake

Mastro’s Warm Butter Cake
Photo Credit: Ross Babel

My guess is they cook it pretty rare and it cooks the rest of the way right on the plate. At $42-48 per steak, I know it’s not affordable, but if you like a great steak, save up and try this one!

6) Creamed Spinach: When a steak is so good, who even needs sides, right?! This spinach wasn’t my favorite. I don’t know if it is just my taste buds, but to me, it lacked flavor. For $10…I’d pass on it.

7) Asparagus: Another lackluster side. I had it grilled and I just wasn’t totally impressed. There wasn’t really anything bad about it, but for $11, it wasn’t anything special either.

8) Warm Butter Cake: Holy deliciousness. I physically don’t think I’ve ever tried a better dessert in my entire life. Since I eat more than the average person (I’m not proud of this lol), that’s a pretty incredible compliment. This cake is truly indescribable (I could try, but probably wouldn’t do it justice) and you’ll just have to head down to Mastro’s to try it out for yourself!

Decor Review:

This place is pretty amazing! It’s a true mix of “traditional steak house” with a modern, trendy twist. It’s dimly lit and is definitely one of Chicago’s hot spots.

The bar area is surely somewhere I’d go back to and hang out. They had amazing live music, delicious cocktails and a fun atmosphere!

Verdict:

Do yourself a favor, if you love steak, great seafood and mind-blowing deserts, save up a little and head over to Mastro’s Steakhouse on 520 N. Dearborn Street in Chicago’s River North Neighborhood.

Have you been to Mastro’s? What do you think? Do you have any other favorite steak restaurants in Chicago?

Love always,
Erica